Windows native port
The previous section explained how to cross-build OpenTURNS from Linux to target Windows. This section gives hints in order to compile OpenTURNS natively with Microsoft Windows tools. This port has started since OpenTURNS 1.4 and is still in an early stage, any help from developers who are familiar with Windows environment will be greatly appreciated.
These instructions have been tested with Visual Studio 2010 on Windows 32 and 64 bits, but they should work with more recent versions too. Visual Studio Express Edition does not ship 64 bits compilers, but they can be installed from Windows SDKs, instructions can be easily found online. No Fortran compiler is required.
Automatic compilation
First of all, CMake must be installed, as well as C/C++ compilers. We will describe below how to use CMake with Visual Studio and Microsoft compilers, but CMake can also be used with other build systems (like NMake, for instance) and other compilers, see CMake documentation for further details.
The following programs are required in order to build OpenTURNS on Windows:
The following programs are optional, and we will show how to embed them into OpenTURNS:
Precompiled binaries for all these programs are available on http://sourceforge.net/projects/openturns/files/openturns/openturns-x.y. If you want to recompile them from sources, you may also have to install
The following programs are optional, and are currently not used by this native Windows port:
Some OpenTURNS components will thus not be available. If R is installed
on your computer, you should edit openturns.conf and set
R-executable-command resource in order to let OpenTURNS use it. On
the other hand, as OpenTURNS is built without Python bindings, Python
scripts cannot be used afterwards.
Installation layout
In this tutorial, OpenTURNS dependencies are installed by following the
layout shown in figure [fig:win-inst-layout]. Below the top-level
directory are four configurations (Debug and Release for Windows 32 bits
or 64 bits). Of course, if you are only interested by a single
configuration, there is no need to create others. Each configuration
contains subdirectories for Boost, hmat-oss, LibXML2, muParser, OpenBLAS
and TBB programs. Each project contains one or several directories:
bin for DLLs, include for header files, and lib for static
libraries.
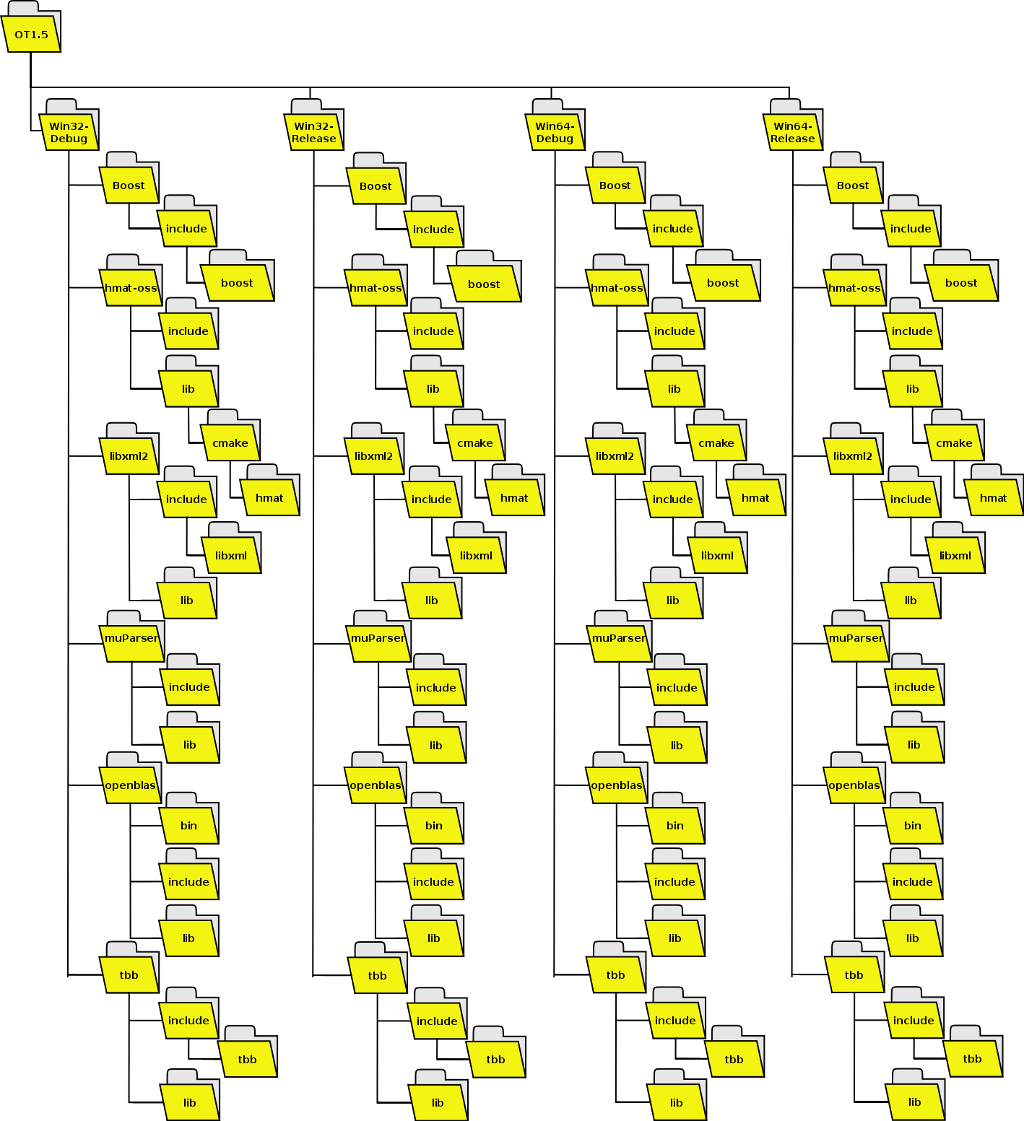
Windows installation layout
For convenience, all libraries will be compiled as static libraries, except OpenBLAS.
Build and install OpenBLAS and TBB
For different reasons, OpenBLAS and TBB cannot be compiled along with
other dependencies. As explained on their site, OpenBLAS is currently
only supported on Windows with Mingw compiler. But binaries can be used
with Visual Studio, this is what we will do. Thus go to
http://sourceforge.net/projects/openblas/files/ and download Windows
binaries, for instance
OpenBLAS-v0.2.13-Win32.zip for Windows 32 bits, or
OpenBLAS-v0.2.13-Win64-int32.zip for Windows 64 bits.
Unzip these archives, and copy files to our installation folder:
OpenBLAS-x.y-Win32\bin\libopenblas.dllintoWin32-Release\openblas\bin\andWin32-Debug\openblas\bin\OpenBLAS-x.y-Win32\lib\libopenblas.dll.aintoWin32-Release\openblas\lib\andWin32-Debug\openblas\lib\OpenBLAS-x.y-Win32\includeintoWin32-Release\openblas\andWin32-Debug\openblas\OpenBLAS-x.y-Win64-int32\bin\libopenblas.dllintoWin64-Release\openblas\bin\andWin64-Debug\openblas\bin\OpenBLAS-x.y-Win64-int32\lib\libopenblas.dll.aintoWin64-Release\openblas\lib\andWin64-Debug\openblas\lib\OpenBLAS-x.y-Win64-int32\includeintoWin64-Release\openblas\andWin64-Debug\openblas\
Note that DLLs have been compiled with Mingw, and require some Mingw runtime libraries. They can be found in http://sourceforge.net/projects/openblas/files/v0.2.12/mingw32_dll.zip and http://sourceforge.net/projects/openblas/files/v0.2.12/mingw64_dll.zip. They are:
libgcc_s_sjlj-1.dll,libgfortran-3.dllandlibquadmath-0.dllfor Win32libgcc_s_seh-1.dll,libgfortran-3.dllandlibquadmath-0.dllfor Win64
TBB comes with its own Visual Studio 2010 configuration file, but we did not find how to integrate it into the build system described below. Thus the easiest solution is to:
Download TBB sources from https://www.threadingbuildingblocks.org/download
Unpack it.
Launch
build\vs2010\makefile.slnSelect
Win32orx64architecture, andReleaseorDebugconfiguration (notRelease-MTorDebug-MT, unless you know what you are doing).If you want to build a static library, edit Properties, tab Configuration Properties, General, Configuration Type, as shown in figure [fig:vs-tbb-static]
Build project.
Copy resulting libraries into installation folder:
build\vs2010\ia32\Debug\tbb_debug.libintoWin32-Debug\tbb\lib\build\vs2010\ia32\Release\tbb.libintoWin32-Release\tbb\lib\build\vs2010\intel64\Debug\tbb_debug.libintoWin64-Debug\tbb\lib\build\vs2010\intel64\Release\tbb.libintoWin64-Release\tbb\lib\
- Copy
include\tbbfolder into installation folders:Win32-Debug\tbb\include,Win32-Release\tbb\include,Win64-Debug\tbb\includeandWin64-Release\tbb\include.
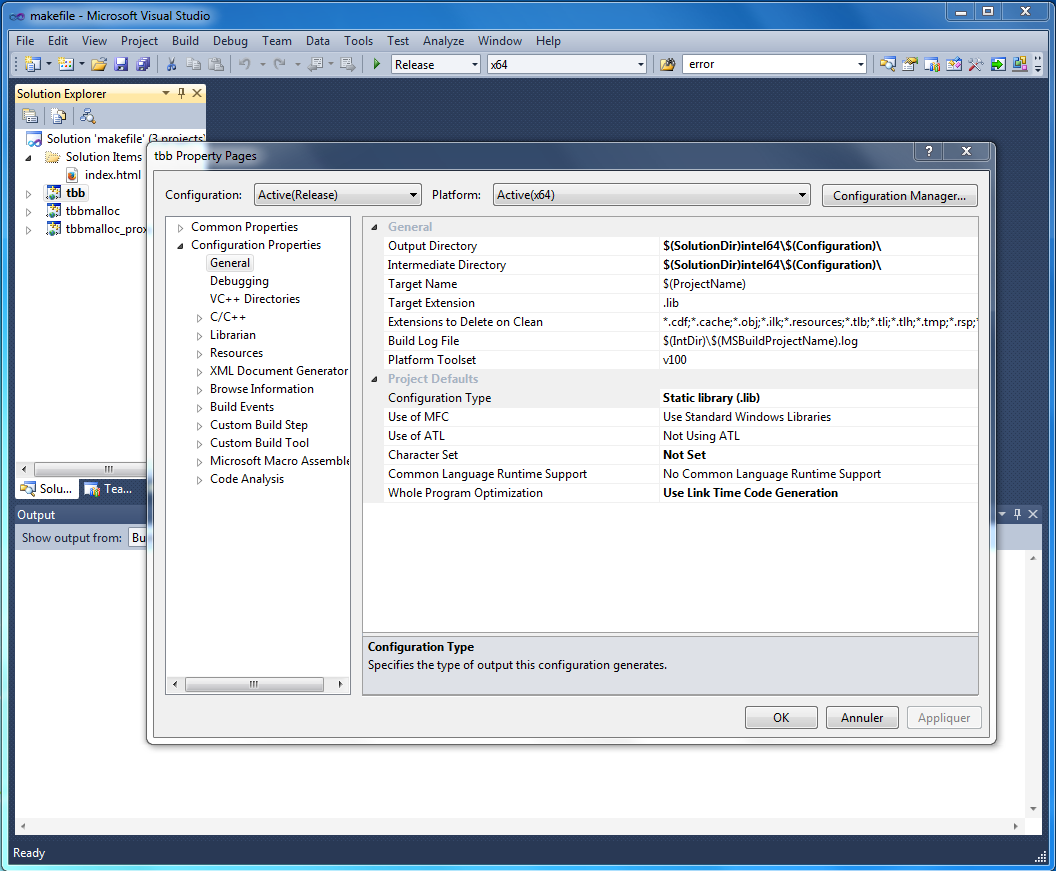
Visual Studio settings to build tbb as a static library
Build and install OpenTURNS
OpenBLAS and TBB are low level libraries. Other libraries use STL, and
care must be taken to avoid mismatch between runtime libraries. To this
end, we decided to use a so called SuperBuild approach with CMake. We
defined a metaproject which drives compilation of those dependencies,
and also of OpenTURNS itself. Clone ot-superbuild git repository (or download an archive
from this URL), launch cmake-gui program, and follow the following
steps:
Launch
cmake-gui, and select source and build directories
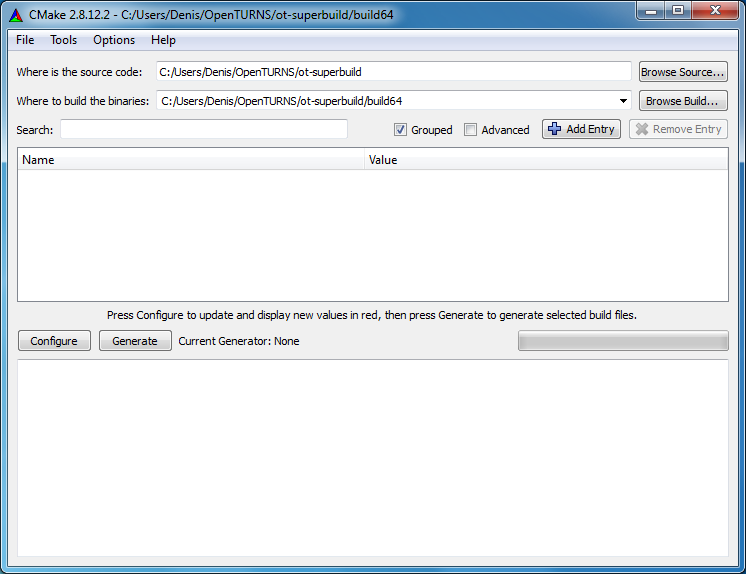
Click on button. Select a generator (either Visual Studio 10 or Visual Studio 10 Win64) and compiler
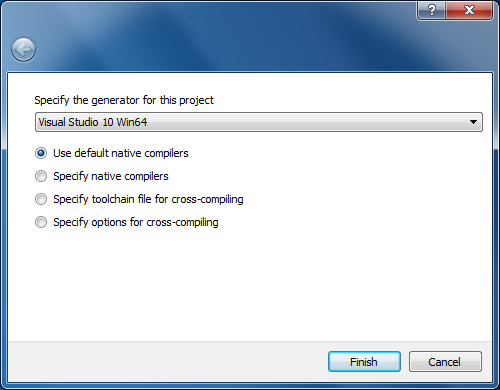
For Win64, CMake may give an error about missing 64-bit tools, as in snapshot below. Visual Studio Express Edition does not embed 64-bit compilers, and CMake thus checks whether we are using Express Edition or not.
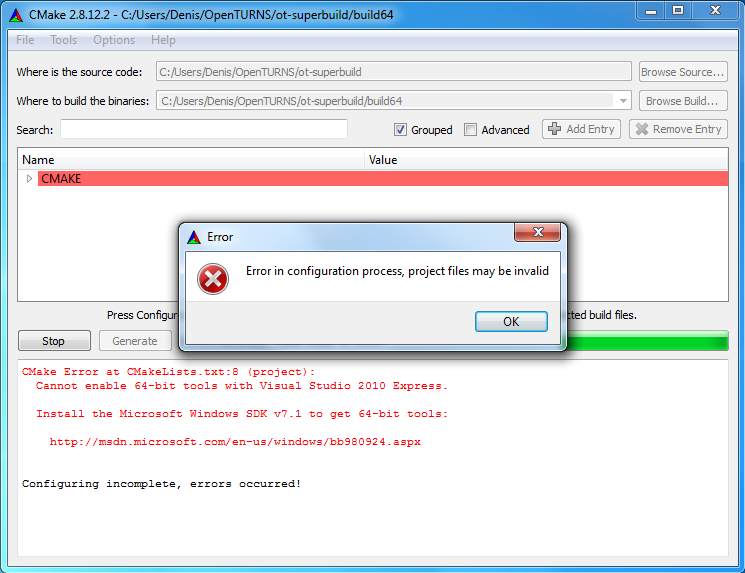
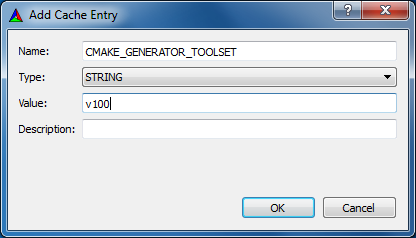
It seems that this detection is sometimes buggy; if you know that
64-bit compilers are available, you can workaround this automatic
detection by clicking on button, adding a CMAKE_GENERATOR_TOOLSET
variable, of type STRING, and value v100.
Click on button again, everything should work fine now, and output window should display
Configuring done.Now that CMake has checked that our compiler is working fine, we can tell it where to find OpenBLAS and TBB. Set
OPENBLAS_INCLUDE_DIR,OPENBLAS_LIBRARY,TBB_INCLUDE_DIRandTBB_LIBRARYvariables, as shown below:
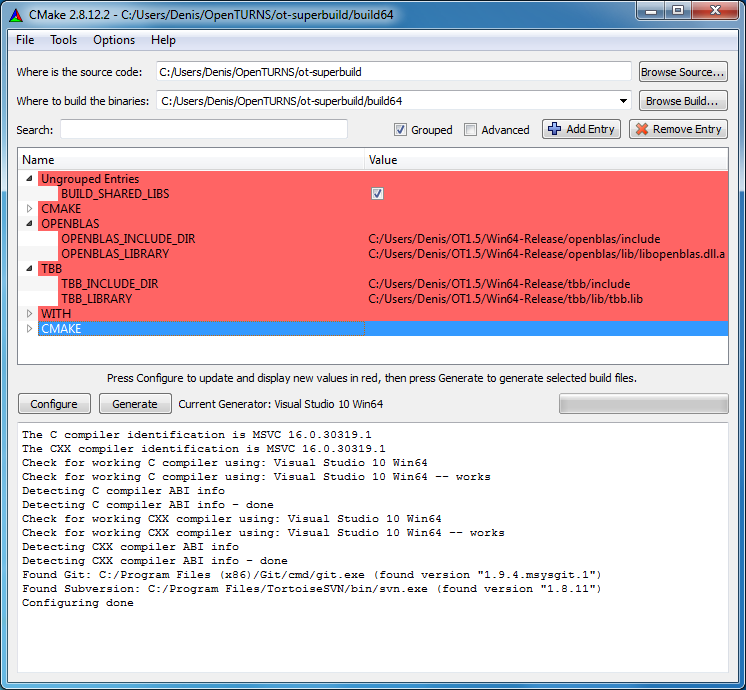
and click on button.
If everything went fine, click on button. This generates Visual Studio solution files in the specified build directory, and you can now close
cmake-guiwindow.Launch
openturns-superbuildsolution file.
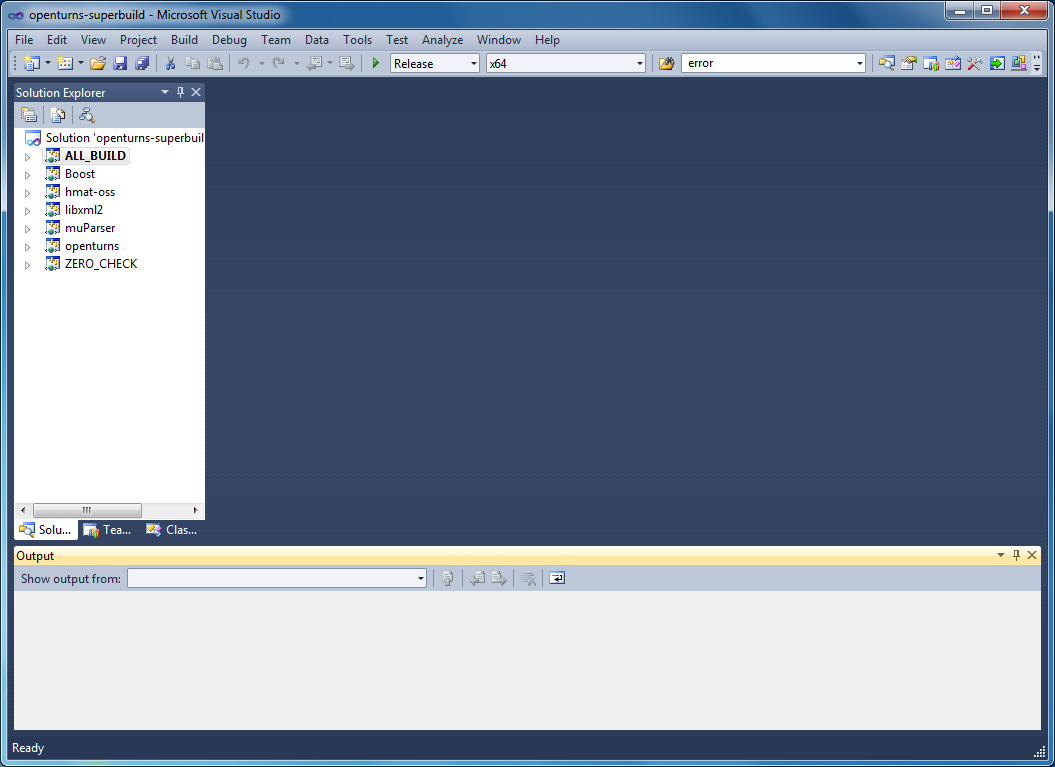
Select Release or Debug configuration (it must match TBB
configuration), and build solution file. This will download sources
(a working Internet connection is thus required), unpack and build
them. It can take a long time on a slow machine, or with a slow
Internet connection, since some downloaded sources are large.
Copy
build64\ExternalProjects\Install\*directories into installation prefix (OT1.5\Win64-Release\, orWin32-Release, etc)
Manual compilation
If you want to modify settings, the simplest solution is to proceed as
in previous section, and modify Visual Studio settings afterwards.
Dependencies are downloaded, built and installed into an
ExternalProjects subdirectory of build directory, ie
build64\ExternalProjects in our example. This directory contains the
following folders:
Build: contains generated Visual Studio projects, and files generated during buildsDownload: contains project archivesInstall: after build, each project installs resulting files (header files and libraries) thereSource: unpacked source filesStamp: keeps track of already processed stepstmp
Each directory in turn contains one directory per project. Thus if one
wants to modify some settings when compiling OpenTURNS, one has to go to
build64\ExternalProjects\Build\openturns\ directory and launch the
Visual Studio solution file found there, in this case OpenTURNS.sln.
For instance, one can build OpenTURNS tests from this solution file.
Beware to always check that active configuration is the desired one.
Unresolved problems
Python bindings are not generated
After installing SWIG and Python binaries, we had been able to generate Python modules without trouble, but Python could not load those modules. It seems that the same version of Visual Studio must be used to compile Python and modules, but we could only find Python binaries built with Visual Studio 9. The solution is to build Python from sources, but this had not been tested yet.
Tests are not run
Tests can be compiled but not launched from Visual Studio, because they are run via shell commands, and also because tests executable are generated in a subdirectory. It is possible to work around those limitations and run tests, but this is currently not automated.
Troubleshooting
It is possible to build multiple configurations with Visual Studio solution files, but this is currently not supported by our
CMakeLists.txtfiles; thus one must launchcmake-gui, adapt variables (for instance paths to OpenBLAS and TBB libraries must be modified for each configuration) and press and buttons.No OpenBLAS library in
Debugmode is provided, but the one fromReleasemode works also inDebugmode. On the other hand, OpenTURNS and TBB configurations must match, it is not possible to link OpenTURNS inDebugmode against TBB inReleasemode, or vice-versa.Boost contains files with very long filenames, which causes trouble on NTFS. If you have already built Boost and want to build it again, Visual Studio may complain that it encountered an error when building it again. In that case, launch file explorer and remove Boost directory, then press again button of CMake (because some of its generated files had been removed too), it should now build fine.
 OpenTURNS